Hoisting Grails to your legacy DB
[Update 2007-07-21] - To try out a working sample application using a legacy schema with a more recent version of Grails, check out this post from the "Grokking GORM" series.
--
So you've heard about Grails and its promise to bring the power of Ruby on Rails to the Java platform. If you're like me, you stand in pure awe of the innovation and power illustrated by Rails, but know that your organization just isn't going to stray from the safety of Java. So if we can achieve similar productivity with a more Java-centric solution, what's not to like? And the more conservative businesses should find additional comfort knowing that Grails applications play nicely with their existing Java code, because Grails applications are written in Groovy (a dynamically-typed scripting language that also happens to be a Java standard).
Grails is still in its infancy (with version 0.1 being the current stable release), but it's slam-packed with many more features than you might expect given its youth, and I expect it to mature rapidly over the next few months. The development team has established an aggressive road map to continue to progress Grails as a solid and rich web development framework.
That all sounds good, but will it work with your legacy databases? If you're familiar with Rails, you know that its convention over configuration approach (which Grails shares) is best suited to greenfield applications where the database schema can be defined to follow the preferred conventions. Shoehorning a legacy database into such a framework, while it can be done, takes away some of that feeling of elegance you get from working with a purely-conforming schema. That said, I was surprised by how little tweaking is required to wrap Grails around a non-conforming legacy schema. Care to see for yourself? Let's get started…
Step 0 - Dust off that Database
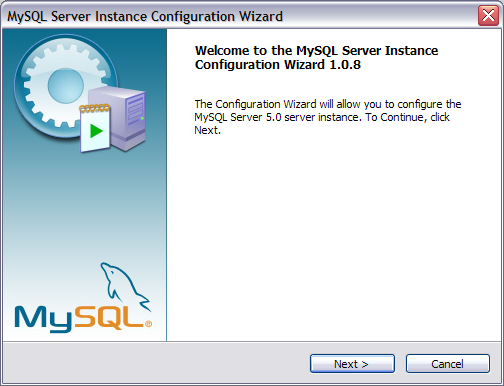
First we'll make sure you have a database server to host that aging schema of yours. While Grails works with most databases, we'll use MySQL for this example. (We can't really call this Step 1, can we? After all, this database has been sitting around gathering dust forever, or at least since before you heard about Grails.)
- Grab the current version of the 5.0.x MySQL Windows Installer. (I'm using Windows Essentials(x86) 5.0.22.)
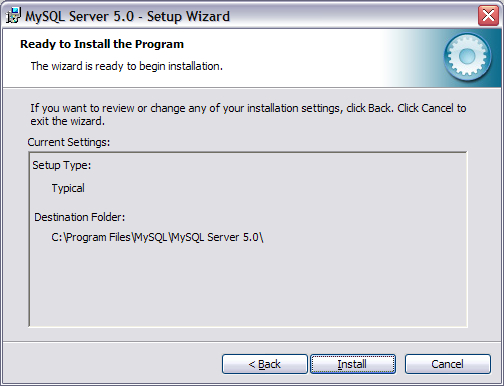
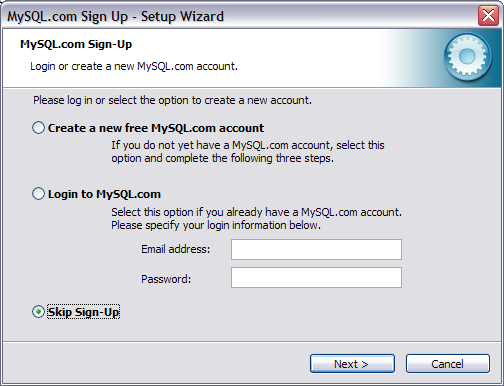
- Run the installer, and continue to take all default settings until you're prompted to sign up for a MySQL.com account.
- We can safely punt here. Select Skip Sign-Up and click Next.
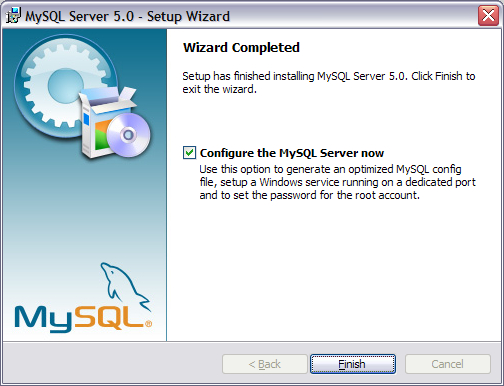
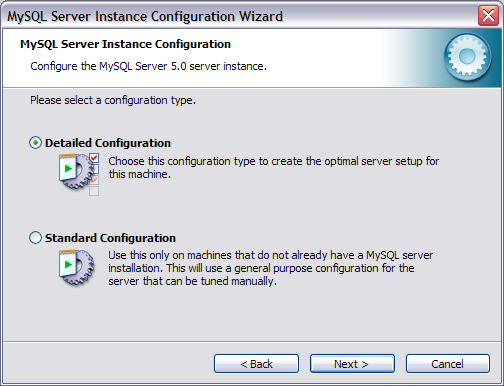
- Click Finish to complete the installation and bring up the configuration wizard.
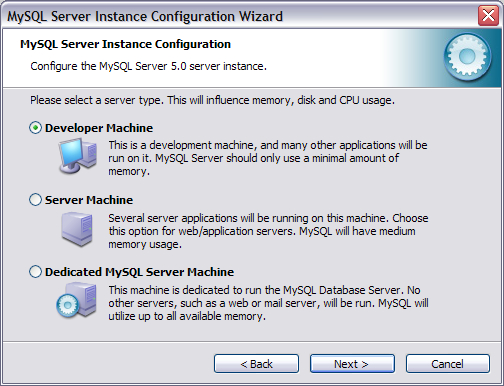
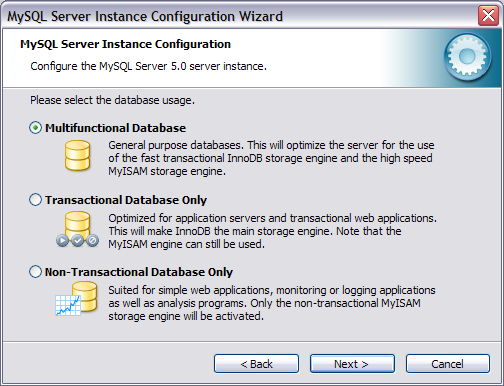
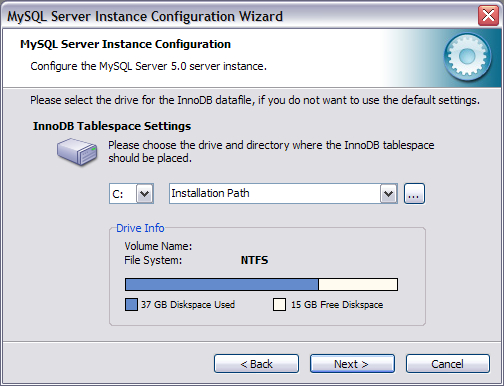
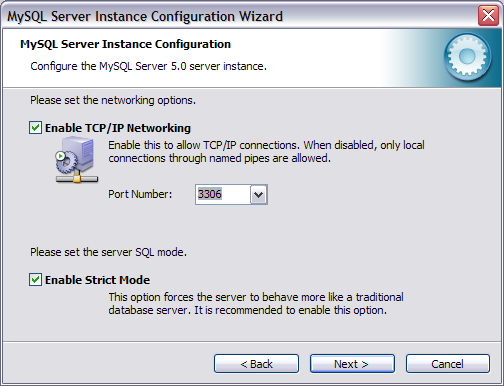
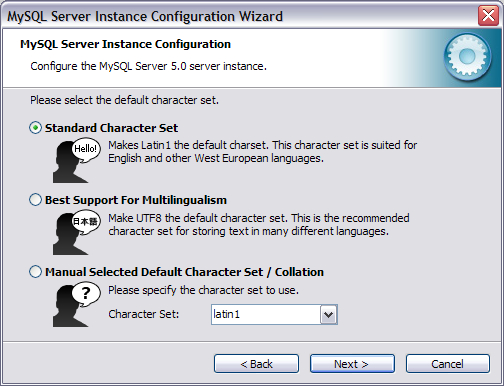
- Click Next until you get to the security section.
- Enter the password you'll use to connect to the database, and click Next. (Keep this password handy, because we'll need it again in a moment.)
- Continue through the last few screens to complete the configuration and start the MySQL server.
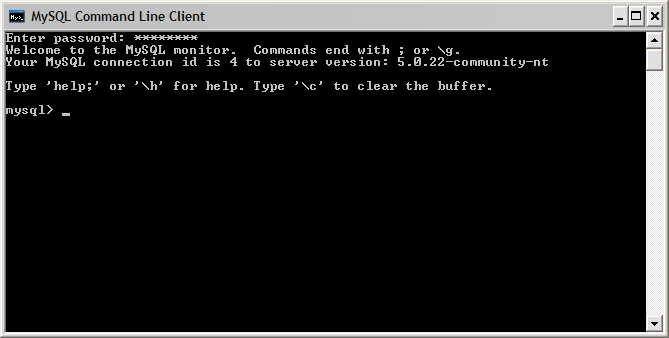
- Open the MySQL Command Line Client. (You can find it in Start-->Programs-->MySQL MySQL Server 5.0-->MySQL Command Line Client.)
- Paste the contents of this file into your console to create and populate your database.
- Now let's check out our data model and the data we have to work with.
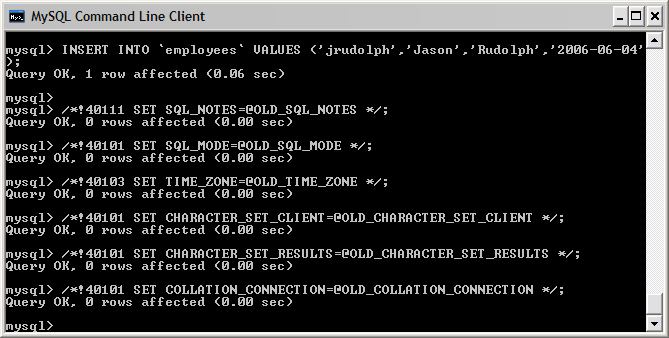
- Enter the queries shown below to verify that your first table is intact and populated. As you can see, our simple (but non-conforming) legacy database houses a list of employees each uniquely identified by an employee ID.
- Then enter the queries shown below to verify that your other table is intact and populated. Notice that the database stores a list of computers and the employee to which the computer is assigned (if any). (For some reason, nobody wants the Tandy.)


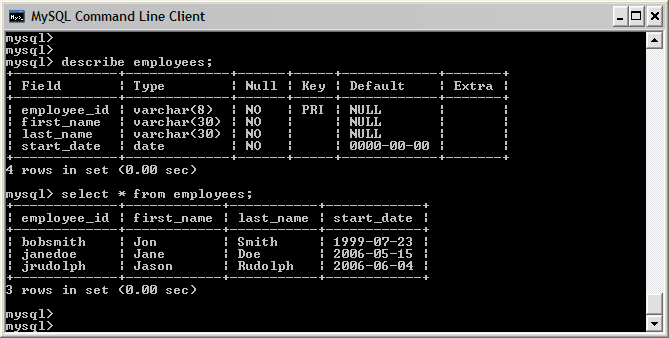
How does this table deviate from what the Grails convention expects? It's all in a name. First, Grails expects each table to have a single column named "id" that represents the primary key. Secondly, Grails prefers that the primary key have no business meaning, whereas the data in this table's employee_id column most likely does have business meaning. We'll discuss the workaround shortly.
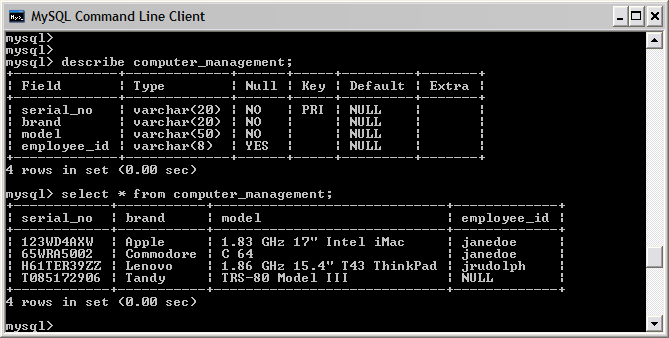
And what's wrong with this table? Well, it suffers from the same problems discussed for the employees table, and then one more issue. Since this table stores computers, we likely want to define a domain model named Computer represent the data in this table. However, by default Grails tries to map each domain class to a table will the corresponding pluralized name - in this case, "computers", not "computer_management". We'll handle this customization as well.
Step 1 - Install Grails
Follow these steps to download and install grails. (As of this writing, Grails 0.1 is the current stable release. So we'll stick with 0.1 for now.)
Step 2 - Hello, Grails!
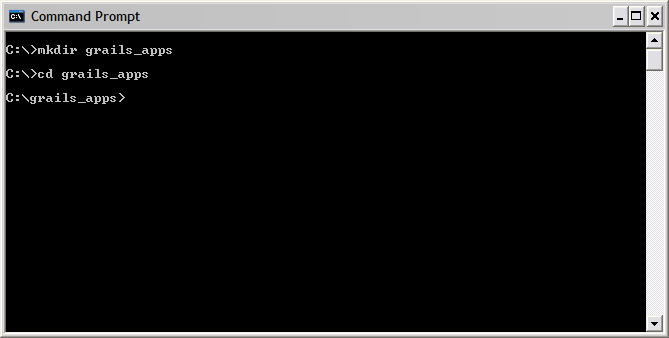
- Now that we have Grails installed, let's create a directory for our Grails applications. You can call it whatever you like, and place it wherever you prefer.
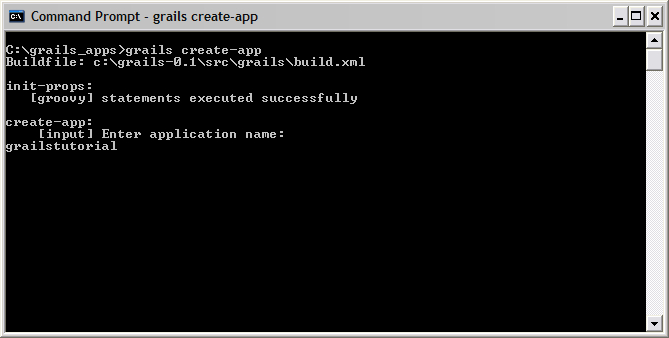
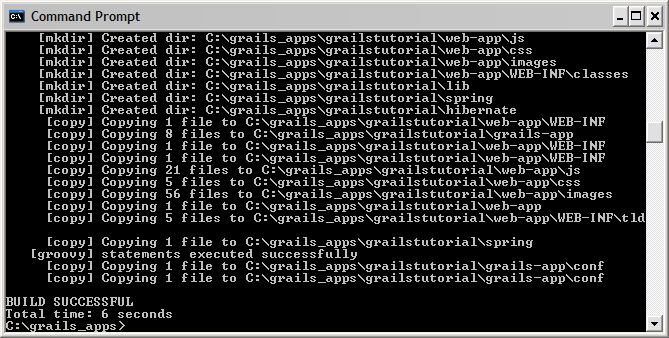
- From within the directory we just created, let's generate our project structure. Enter grails create-app and hit Enter.
- When prompted for an application name, type grailstutorial and hit Enter.
- Grails should declare a successful build, and we're ready to configure our database properties. (If you're curious, grails.org offers a good overview of the project structure that Grails uses for its applications.)
- Grails comes pre-packaged with HSQLDB, but since we're using MySQL, we have a few quick steps to tell Grails how to talk to our database. First, download the Java MySQL driver from http://www.mysql.com/products/connector/j/. I opted for the current production-ready version which, as of this writing, is 3.1.13.
- Open the zip file and extract the mysql-connector-java-3.1.13-bin.jar file into the lib directory of your Grails application. (Please note that the exact name of the JAR file may differ based on the version of the driver you downloaded. No worries.)
- Now we're ready to tell Grails where to find our database. Open ApplicationDataSource.groovy in your editor of choice and modify it to match the settings below. You'll find this file in C:\grails_apps\grailstutorial\grails-app\conf.
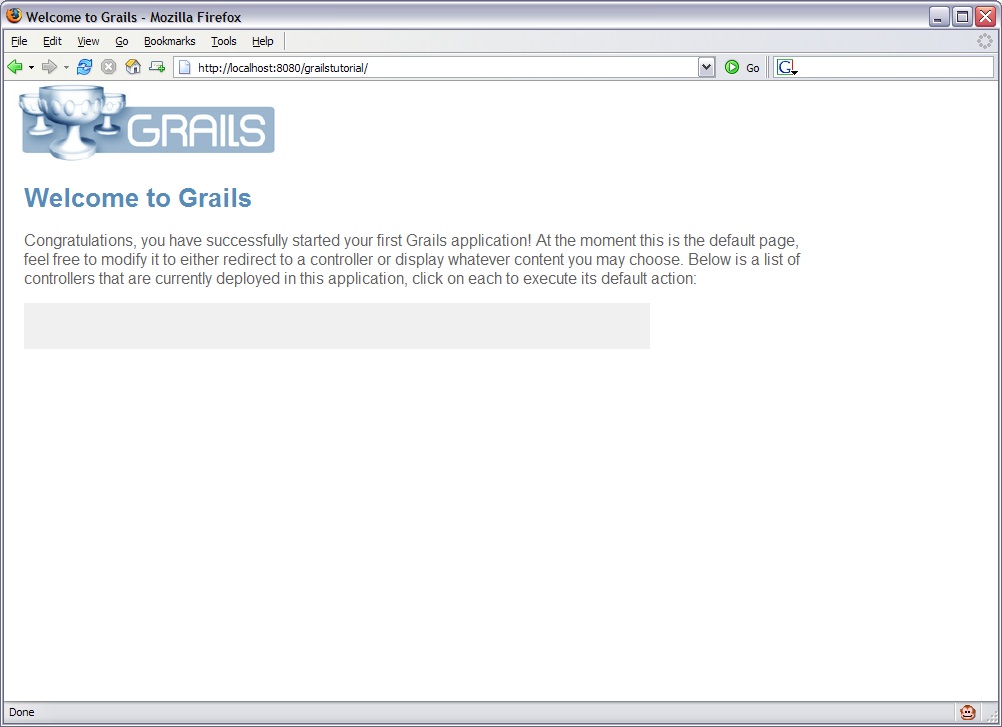
- Alright, let's test. From within your application directory (C:\grails_apps\grailstutorial), type grails run-app and hit Enter.
- The application is now waiting to respond to your requests at http://localhost:8080/grailstutorial/.

class ApplicationDataSource {
     @Property boolean pooled = true
      //@Property String dbCreate = "create-drop"
     @Property String url = "jdbc:mysql://localhost/grailstutorial"
     @Property String driverClassName = "com.mysql.jdbc.Driver"
     @Property String username = "root"
     @Property String password = "password"
 }
Note that we commented out the dbCreate property. Valid values for this optional property are "create", "create-drop", or "update". These values all instruct Grails to alter your database schema (in one way or another) at runtime to synchronize it with your domain classes. Since we're dealing with a legacy database here, we'll assume that we're forbidden from modifying the table structure. So, by commenting out this property, we're instructing Grails to leave the schema as is.
[UPDATED: June 27th, 2006: This screen shot has been corrected to reflect what you should see at this point. Thanks to Rob Kainz for pointing out the problem with the screen shot formerly shown here. That screen shot incorrectly included a link to the EmployeeController, which will not be present until we generate the controller in an upcoming step.]
OK. So, admittedly this isn't particularly exciting. Before we see any real functionality, we first need to create our domain
model and generate UI components to manage our model.
We just wanted to make sure everything's working so far. (You didn't want to build the application end-to-end before you tested it, did you?)
Step 3 - Mastering Your Domain
Recall that Grails favors convention over configuration. Well, the Grails convention gives precedence to your domain model over the database schema. In a greenfield application, we could start with no tables at all and just define our domain classes in Grails. Grails would then generate the database tables for us based on our domain model.Since we're working with a legacy database, we don't fit quite as nicely into the standard Grails convention. So this is where some configuration comes into play.
- If you're application is still running, hit Ctrl-C in the Command Prompt window to stop your application.
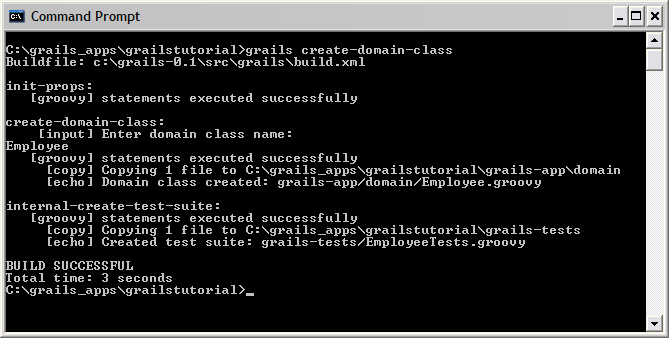
- Now let's generate the domain class that will correspond to our employees table. From within your application directory (C:\grails_apps\grailstutorial), type grails create-domain-class and hit Enter.
- When prompted for the name of your domain class, type Employee and hit Enter.
- Grails generated the following class for us, but we need to tweak it to work with our legacy database structure.
- Update the class to match the code shown below.
- Note that we changed the data type of the id attribute from
LongtoString. Recall from earlier that the standard Grails convention expects the unique identifier for your domain objects to be a database-generated numeric value (i.e. a surrogate key). However, our legacy database uses a primary key that has actual business meaning (i.e. the employee's textual user ID). - Note also that we removed the
versionattribute. Grails also prefers that your table have a column for capturing the version number for each object. (This preference is actually a product of Hibernate, which provides the underlying persistence framework for Grails.) Our legacy table does not have this attribute, so we must remove it from our model. - There's just one more bit of configuration we have to face in order to get Grails to cooperate with our database model.
- Save this file as hibernate.cfg.xml and place it in the hibernate folder (C:\grails_apps\grailstutorial\hibernate) of your application. Most of its parameters mimic the default values you'd get with Grails out-of-the-box. The important entry to note is the
mappingentry. This particular mapping entry tells Grails (well, Hibernate) that it needs to look at our custom mapping configuration in Employee.hbm.xml. - Save this file as Employee.hbm.xml and place it in the hibernate folder (C:\grails_apps\grailstutorial\hibernate) of your application. Again, most of its parameters mimic the default values that Grails provides out-of-the-box. Lets have a closer look at this file.
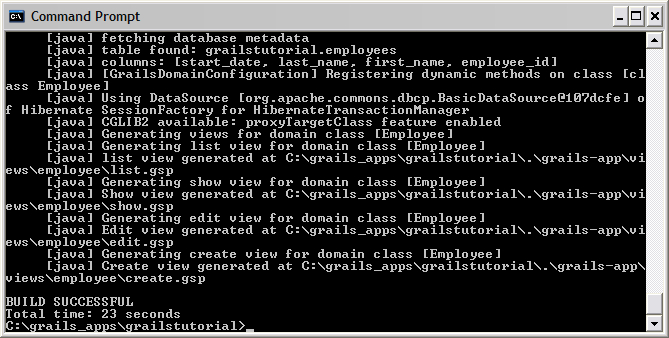
- We've got our domain model taken care of, and we need to tell Grails to generate its UI scaffolding. From within your application directory (C:\grails_apps\grailstutorial), type grails generate-all and hit Enter.
- When prompted for the name of your domain class, type Employee and hit Enter.
- Grails has now created the UI components to provide all CRUD (i.e. Create, Read, Update, and Delete) functionality for the employees table. It's time to test again. From within your application directory (C:\grails_apps\grailstutorial), type grails run-app and hit Enter. You should once again see the application start successfully.
- Open a browser and navigate to http://localhost:8080/grailstutorial/.
- Grails conveniently displays all controllers associated with the application. (Of course you'd replace this page with your own starting page before deploying your production application, but this feature is nevertheless great for getting started.) Click on the link to the EmployeeController.
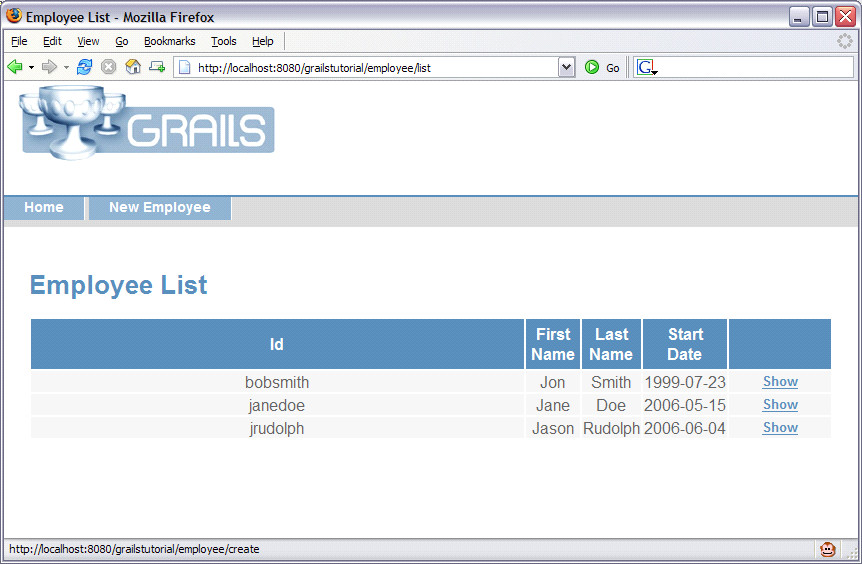
- We're first presented with a list of all employees. (Try not to get too hung up on the look-and-feel of the application at this point. What's important to notice is just how quickly we've built to a functioning application. This look-and-feel can easily be and is frankly intended to be replaced/modified to fit your needs. If you need to sit down with a client to quickly prototype an application, this scaffolding can ease that process greatly. Best of all, you can then grow your prototype into your real application...instead of having to throw your prototype away and start the real application from scratch.)
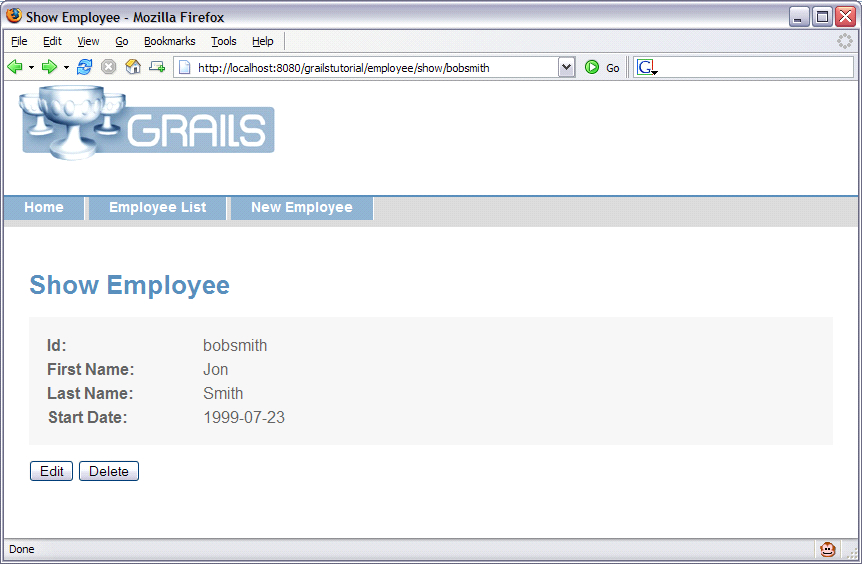
- For starters, let's click on one of the Show links to see the details for a particular employee.
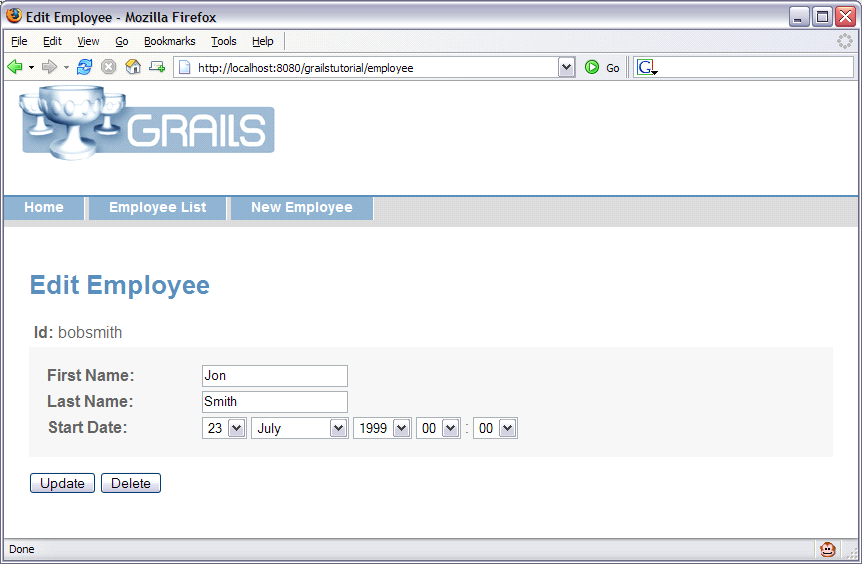
- From here, let's edit this entry.
- So here's at least one thing we'll want to customize. Our Start Date field also allows the user to edit the time (i.e. hour and minute), but we really only want to capture the date. Since the
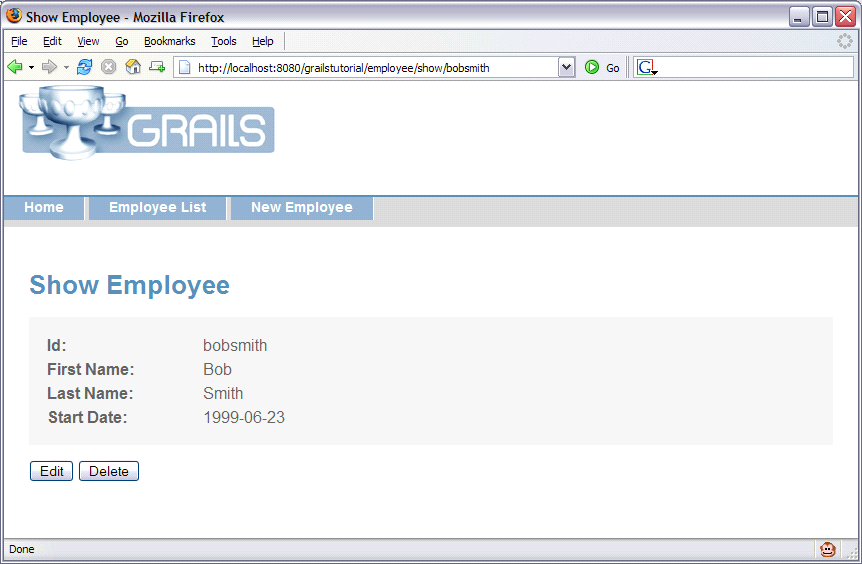
startDatemember in theEmployeeclass is of typejava.util.Date(which of course contains a full timestamp down to the millisecond), Grails hasknowno way of knowing that we only care about the year, month, and day. So, let's make a note that this is something we'll want to tweak. - To complete our test of the edit functionality, let's change this employee's first name from ‘Jon' to ‘Bob' and click Update.
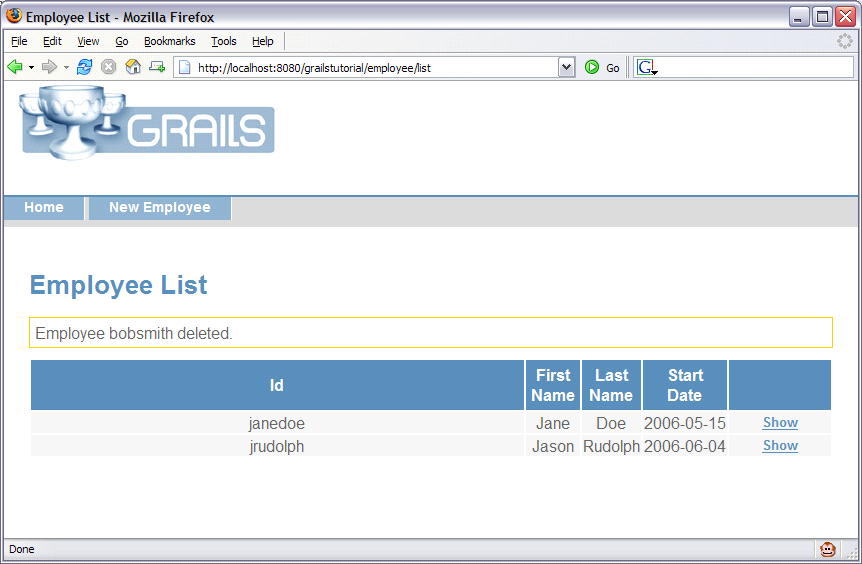
- Now let's try out the delete functionality. Go ahead and click Delete.
- Well, that was easy. Perhaps a bit too easy, don't you think? We should probably ask the user first before actually deleting good ol' Bob Smith. Let's make a note to come back here and add a simple ‘Are You Sure' prompt before deleting an employee.
- We have one bit of CRUD left to try out. Click on New Employee and let's add back our buddy Bob.
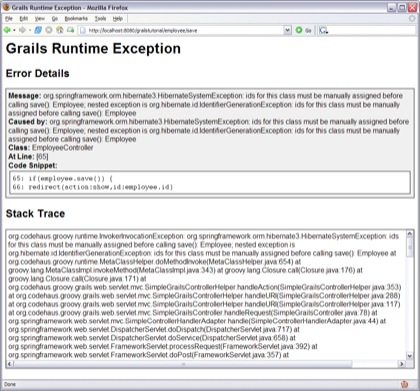
- Fill in Bob's data and click Create.
- Whoa! That's not what we wanted. What happened? Did you notice that we weren't asked to specify an employee ID for the new employee. When we were configuring the Hibernate mapping files, we mentioned that the application logic (not the database) will bear responsibility for assigning a unique ID to each employee. The Grails convention prefers that the unique ID be generated behind the scenes, but since our ID has business meaning (perhaps as a user's LAN ID), we need to allow the user to explicitly specify the employee ID.
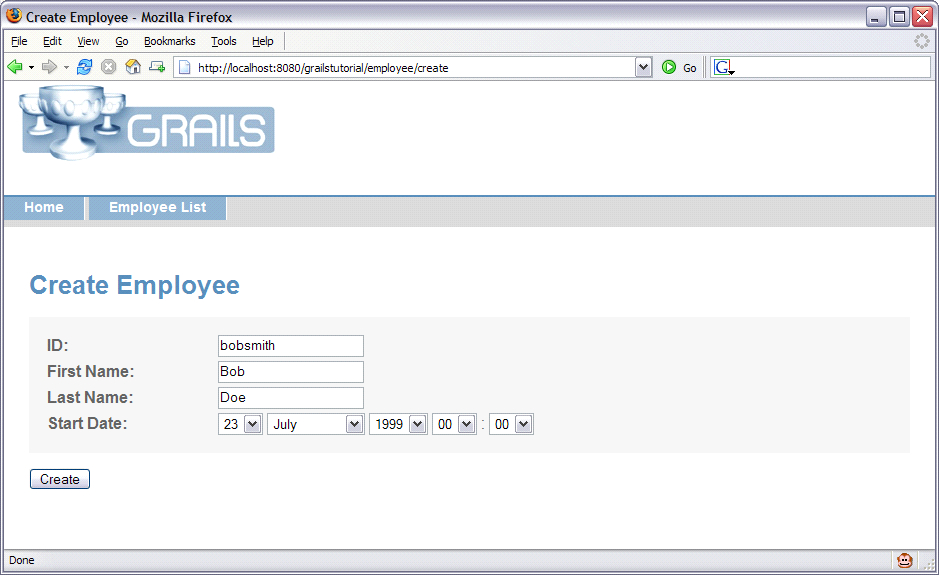
- Save the changes to create.gsp, and let's try to add an employee again.
- Point your browser to http://localhost:8080/grailstutorial/employee/create. We're now prompted for an employee ID as well.
- Fill in Bob's data and click Create.
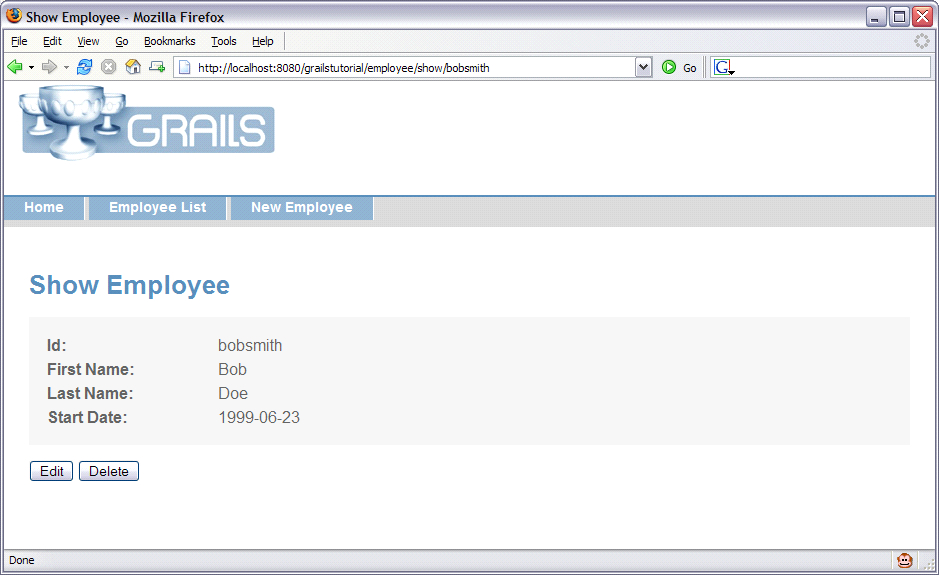
- Success!
 class Employee {
     @Property Long id
     @Property Long version
     String toString() { "${this.class.name} :  $id" }
 }
It's important to note that the next two steps (steps 6 and 7) are only required because the employees table doesn't conform to the expected convention. Even though these steps are fairly quick to get through, know that if our table followed the standard convention, Grails would automatically infer all the information that we'll explicitly state in these next two steps.
 class Employee {
     @Property String id
     @Property String firstName
     @Property String lastName
     @Property Date startDate
     String toString() { "${this.class.name} :  $id" }
} Because we deviate from the default convention, we need to tell Grails how to map the database columns to our domain model (and vice versa).
The Grails convention expects our primary key to be named “id”. If our primary key was named “id”., then none of this XML configuration would be necessary.
Since our actual primary key is named “employee_id”, we need to explicitly map the database columns to our domain model.
Also note that since our primary key has business meaning (i.e. it's not an ID generated by the database), we need to inform Grails that the application logic will bear responsibility for assigning the value to the id column. We do so with the generator tag (<generator class="assigned"/>).


Because our database design deviates from the standard convention, we need to make a slight adjustment to the UI that Grails generated for adding a new employee. Open up the create.gsp file in your editor of choice and add a field for the employee ID. You'll find this file in C:\grails_apps\grailstutorial\grails-app\views\employee\create.gsp.
Here's the content we need to add, and the file should look like this when you're done.
  <tr class='prop'>
     <td valign='top' style='text-align:left;' width='20%'>
       <label for='id'>ID:</label>
     </td>
     <td valign='top' style='text-align:left;' width='80%'
       class='${hasErrors(bean:employee,field:'id','errors')}'>
       <input type='text' name='id' value='${employee?.id}' />
     </td>
   </tr>
Summary
So, let's review what we had to do over and above the standard Grails steps in order to get our non-conforming schema to work with Grails. We had to...
- Remove the default attributes from our domain class (since our table did not include a database-generated id column or a version column).
- Add Hibernate mapping files to map the attributes of our
Employeeclass to the columns of our employees table. - Modify create.gsp to allow the user to specify the employee ID when adding a new employee.
Next Steps
We can now manage our employees table, but we still need to add support for the computers table. And since there's a relationship between employees and computers, we'll want to make sure our UI can manage that relationship as well. We'll add that functionality in a future session. In the mean time, there were a few things we noted that we wanted to clean up. Shall we consider this an extra credit assignment?
- We can make the delete functionality a bit more friendly by providing a simple “Are You Sure” prompt to the user before deleting an employee.
- In the UI for creating and editing an employee, the Start Date field includes input for the hour and minute. We only want the year, month, and day.
Pretty straightforward, right? For even more usability enhancements, we should also...
- Add some validation to make sure we have data for all required fields, and that the data is of the appropriate type and size to be safely persisted to the database. (For example, we need to make sure that an employee ID does not exceed the maximum length allowed by the employee_id column.)
- Add some simple confirmation messages after we successfully create, update, or delete an employee. (Hint: if you know how this is accomplished in Ruby on Rails, then you're almost done with this enhancement already.)
Useful Links
- Grails User Guide - http://grails.org/User+Guide
- Grails User Mailing List Archive - http://www.nabble.com/grails---user-f11861.html
- Groovy Home Page - http://groovy.codehaus.org/